I accidentally deleted important photos and videos from my SD card while moving files, and now I really need help getting them back. The card was used in my camera, and I’m worried that using it more could overwrite the deleted data. What’s the best way to recover deleted files from an SD card safely and improve my chances of restoring everything?
I’ve done this before, and yeah, it feels awful. One bad tap, one wrong folder, and a whole shoot looks gone. Still, if you stop right now and handle the card carefully, your photos might still be recoverable.
First thing, remove the SD card from your camera or phone. Put it aside. Do not shoot more photos on it. Do not copy stuff onto it. Do not let the device keep using it.
The reason is simple. Deleting a photo usually does not erase the photo data right away. The device often removes the record pointing to the file and marks the space as free. Your images are often still sitting on the card until new data lands on top of them. Once new photos overwrite those sectors, recovery drops off hard. I learned this the ugly way after taking a few “test shots” and losing half a set. Bad move.
If you want the best shot at recovery, this is the route I’d take:
1. Use an actual SD card reader. Skip the camera-to-computer USB cable if you can. A lot of phones and cameras connect in MTP mode, and your computer won’t see the card in the low-level way recovery apps need for a proper scan. Put the card into your laptop’s slot or a USB card reader instead.
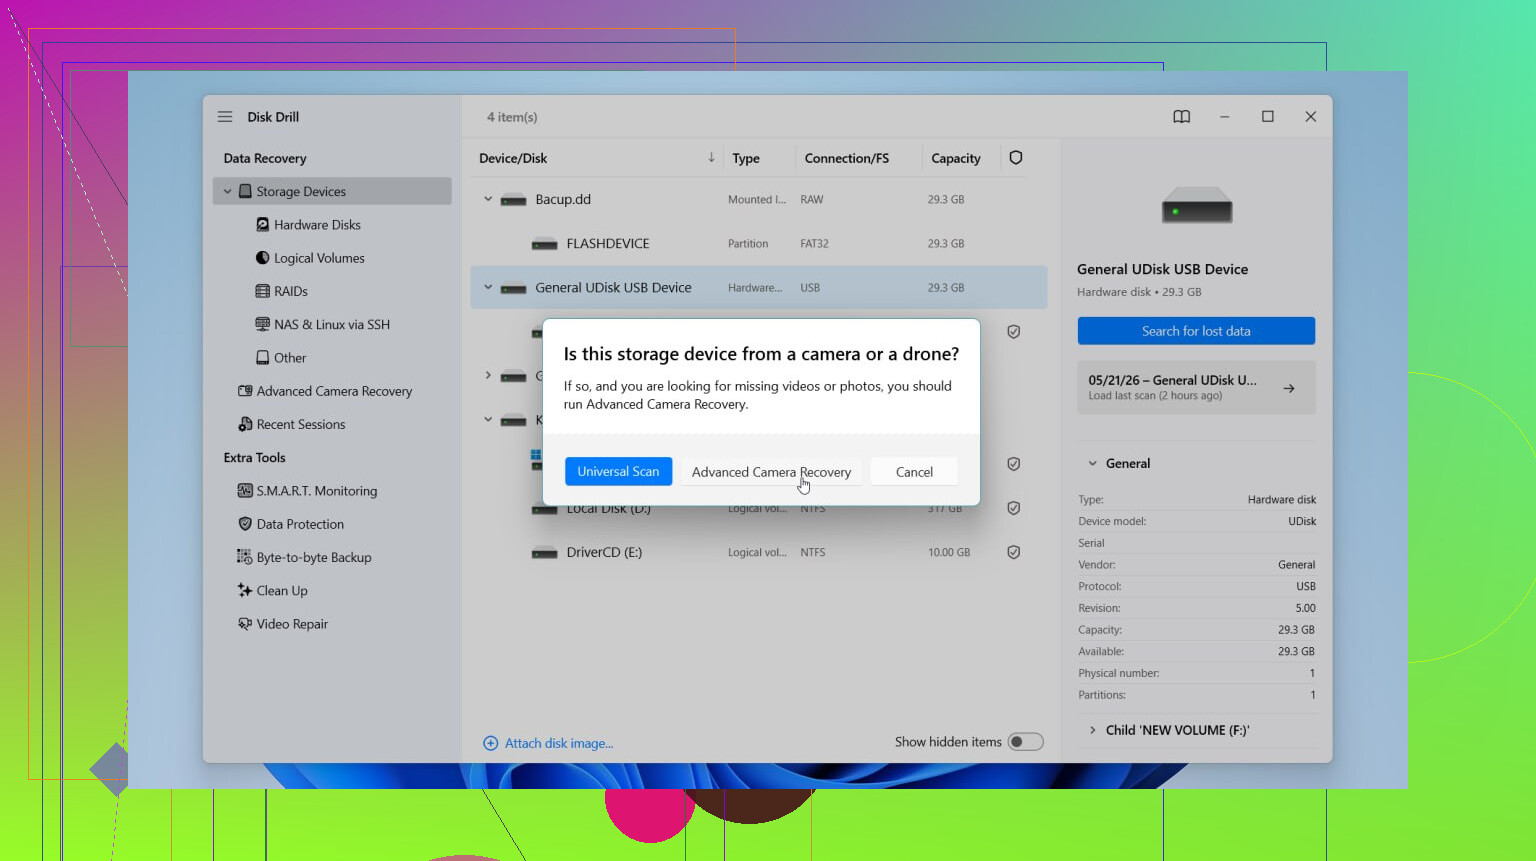
2. Scan it with recovery software. Out of the ones I’ve tried, Disk Drill gave me the least hassle on SD cards. What helped me most was the preview. I could check whether the recovered photos were intact before saving anything. For video files, it also has an Advanced Camera Recovery mode, which matters if you’re dealing with footage from drones, action cams, or mirrorless bodies where clips get split up weirdly. On Windows, the free tier lets you recover up to 100MB, so you can test whether your files show up before spending money.
3. Recover to a different drive. This part matters more than people think. When the software asks where to save recovered files, do not point it back to the SD card. Save to your computer’s internal drive or another external disk. Writing recovered files onto the same card is how people wipe out the leftovers they were trying to save. I’ve seen people do this once, and yeah, it went badly fast.
If you don’t want to use Disk Drill, here are a few other paths, depending on how much friction you’re willing to deal with:
- R-Studio works well if your card had lots of RAW files like NEF or CR2. One thing I like is disk imaging. You make a full byte-for-byte copy of the card first, then scan the copy instead of stressing the original media. The tradeoff is the interface. It’s not friendly, and the trial has limits.
- TestDisk is free and open source. Old school tool, still useful. If the partition got messed up, it has teeth. The problem is the workflow. No real GUI, lots of command-line style interaction, and it’s not fun if you only want to browse deleted photos one by one.
- DiskDigger is lighter and easy to run on Windows since you don’t even need a full install. It recognizes a lot of photo and video signatures. The annoying part is the free version. If you’ve got thousands of files, confirming them one at a time gets old realy fast. There’s also an Android version, but on rooted phones it works much better.
One thing I would not do is run repair tools like CHKDSK on Windows or First Aid on macOS if your goal is getting deleted photos back. Those tools try to repair file system problems, not recover deleted media. In some cases they clean up orphaned data and make recovery worse. I’ve seen forum replies push people toward those tools, and I wouldn’t risk it on a card with important photos.
So, short version. Stop using the card. Put it in a card reader. Scan it with proper recovery software. Save recovered files somewhere else. If you move carefully, you’ve still got a shot.
5 Likes
If the files were deleted while moving them, check the destination drive first. A move gone bad often leaves files on the computer, temp folder, or recycle bin side, not only on the SD card. I’d do this before a deep scan.
Also, if your camera has a “protect” switch on the SD adapter or a lock tab on full-size SD, use it before putting the card in a PC. Read-only access lowers the risk of the OS writing cache files. Small thing, but it helps.
I agree with @mikeappsreviewer on stopping use of the card. I disagree a bit on one point though. CHKDSK is bad for deleted file recovery, yes. But if the issue turns out to be file system damage and not deletion, making an image first, then testing repairs on the image, is safer than ignoring corruption.
My order:
- Search the computer you moved files to.
- Check hidden folders and the recycle bin.
- Make a full image of the SD card first if the data matters a lot.
- Scan the image, not the card, with Disk Drill or another recovery tool.
- Save recovered files to a different drive.
Disk Drill is fine here because photo preview saves time, and SD card recovery is one of the easier use cases for it. If you want a quick look at how it works, this Disk Drill recovery walkthrough for deleted SD card files is a decent watch.
One more thing, don’t format the card “to fix it.” People do taht and make the job harder.

I’d add one thing to what @mikeappsreviewer and @sternenwanderer said: check whether the files were actually copied before they were deleted. A lot of “move” operations fail halfway, then Windows leaves stuff in odd places. Use search by file extension on the destination drive, like .JPG, .CR3, .MP4, .MOV, and sort by date. Also check the Photos app/library if you imported instead of moved.
Where I slightly disagree is imaging first in every case. If the card is healthy and mounts normally, sometimes a straight read-only scan is faster and less stress for a panicked user. If the card is acting flaky, disconnecting, or asking to be repaired, then yeah, image first no question.
Also, look at your camera brand’s folder structure before recovery. If you shot on Canon/Sony/Nikon, some clips or sidecar files may be in nested DCIM or PRIVATE folders and not truly gone. People miss that all the time.
For actual recovery, Disk Drill is solid mostly because it previews photos/videos well and doesn’t make you guess what’s recoverable. Just save recovered stuff somewhere else. Not back to the SD. Obvious, but ppl still do it.
If you want more opinions, this helpful Reddit thread on recovering deleted files from an SD card is worth a read.
And yeah, do not “test” the card by taking a few new pics. Thats how recoverable turns into gone.
One extra angle nobody’s mentioned enough: check for cloud/import leftovers. If you moved files through Windows Photos, macOS Photos, Lightroom, or a camera vendor app, the originals may already be in that library even if the SD card entry vanished. I’d search app libraries, not just folders.
I slightly disagree with scanning first if the card is behaving weirdly. If reads are slow, the card disconnects, or thumbnails hang, every extra pass is a gamble. At that point, cloning the card with a sector-level tool is worth the hassle, then do recovery work on the clone.
About Disk Drill since it came up from @sternenwanderer, @techchizkid, and @mikeappsreviewer:
Pros
- easy preview for photos and some videos
- simple enough when you’re stressed
- decent support for camera card recovery
- can recover from an image file, not just the live card
Cons
- free recovery limit on Windows is small
- deep scans can return lots of duplicates/unnamed files
- not my first pick for badly corrupted cards
If the deleted files were videos, don’t judge recovery by filename alone. Cameras often fragment clips, so a file that looks wrong might still open partially after recovery.
Also, after you recover anything important, retire that SD card if it has shown errors. Cards are cheap, reshoots aren’t.